|
Operator Console
|


All Classes Namespaces Files Functions Variables Typedefs Enumerations Enumerator Friends Macros Pages
|
Operator Console
|
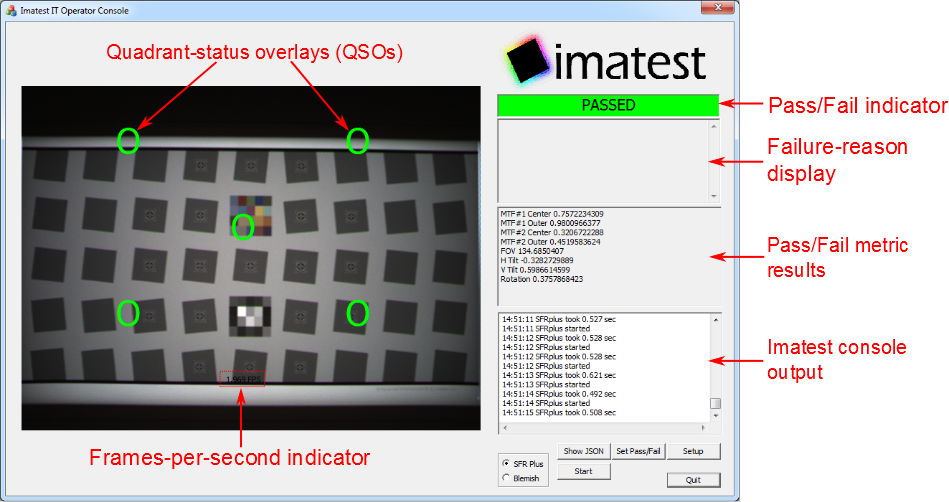
Shown above is the main window of the Operator Console where the device under test has passed a SFRplus test. The main window provides a user interface for selecting a test (using the radial buttons marked 'Blemish' and 'SFRPlus') and viewing the results through several indicators. When the user clicks the 'Start' button, the selected test will start as indicated in the Imatest console output display and the acquired image will be displayed.
Whether or not the device has passed is indicated in several fields. The overall pass/fail status is prominently displayed near the top right corner of the main window. If the device has failed, the criteria that it did no pass are indicated in the next field below. The results from the Imatest library is displayed in the middle field on the right side of the operator console. Lastly, the success or failure of the device at individual quadrants of the image is overlaid over the image with either a green 'O' for pass or red 'X' for fail. Note that these quadrant-status overlays are currently at fixed locations in the window and do not track the locations within the image specified by the user.
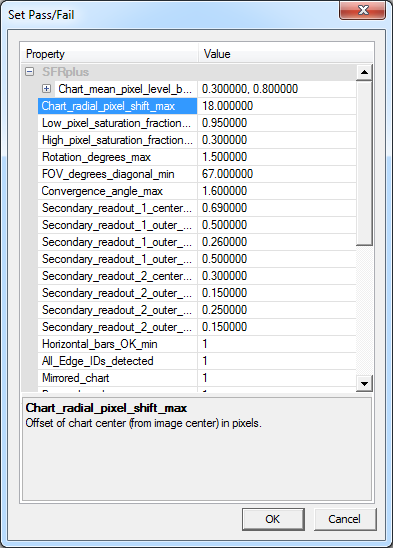
The pass/fail window shown above is accessed by clicking the 'Set Pass/Fail' button on the main window and allows the user to modify the pass/fail ini file from within the Operator console after entering the administrator password. Currently, this dialog window is limited in that the user cannot add additional fields. For the fields already existing in the pass/file ini file, when the user clicks the 'OK' button, the values present in the dialog are written to file as well as updating the values used by the Operator Console.
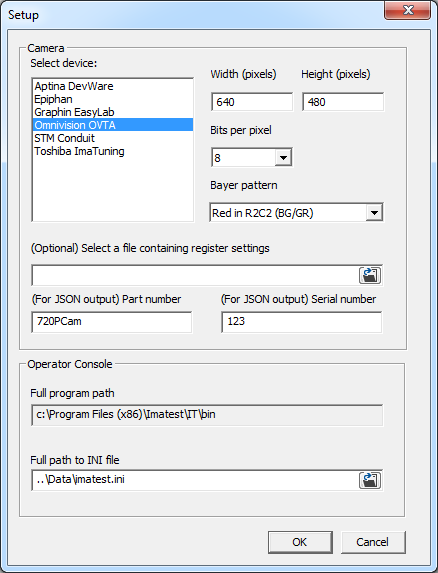
The Setup window allows the user to change the details of the camera from which to acquire. The Operator Console can acquire from any device supported in Imatest 3.10. Shown above is an example where 'Omnivision OVTA' has been selected. As with the other devices, there is a camera width field, as well height, Part number and Serial number fields. Unique to 'Omnivision OVTA' are the 'Bits per pixel' (only 8 bits-per-pixel currently supported) and 'Bayer pattern' drop-down menus as well as the field for optionally entering a file containing register settings. Once the user clicks the 'OK' button, the program updates with the given settings and resizes the main window if needed.
 1.8.6
1.8.6